Adobe Experience Manager 6.4 Launched: Know Some Major Highlighting Features
Latest Features of AEM 6.5 Released in April 2019
From the grand stage of the Adobe Summit 2018, held from 25th – 29th March at Las Vegas, the curtain from the latest Adobe Experience Manager 6.4 version was unfolded. The latest Adobe CMS has been launched with many amazing features and here we are going to look at some major highlights of AEM 6.4.
Some salient features of AEM 6.4 are :
1.
Advanced Fluid Experience Integration
Advanced Fluid Experience integration ensures the fast flowing of content across owned, earned and paid media channels. The unique combination of data and content in Adobe Experience Manager 6.4 helps brands to take customers on a variety of personalized journeys.
2.
Integration Of The Adobe Sensei To Experience Manager 6.4
3.
Advanced Security Along With Cloud Scale
4.
Parallel Handling Of Marketing, Creative, And IT Operations
The integration of the new user interface has made it possible to work freely at marketing, creative, and IT operational level without causing hindrance to any other segment. Also, the Single-Page App (SPA) Editor helps you to use and collaborate with the latest front-end developer technologies and business associates for content.
5.
Personalized Experience For The Customers
The Adobe Experience Manager 6.4 comes with the Smart Layouts that has been powered By AI to give personalized brand experience to the customers. Based on the previous buying trends of the customer, the page automatically modifies the suggestions to suit them the best. Further, the use of Adobe Target helps you to take personalization for the specific customer to the next level.
All in all, it can be said that Adobe Experience Manager 6.4 has been combined with the various digital marketing features based on the cloud and machine learning to provide the best-personalized customer experiences.
This is just a glimpse of the upcoming AEM 6.4, and in the subsequent articles, we will discuss each feature in detail to understand it more profoundly.
If you want to know more about Adobe Experience Manager 6.4, or need any assistance with your current or next Adobe project click here or call us at +1-847-592-2920.
Boost Your User-Generated Content (UGC) Production With Experience Manager Livefyre
The cutthroat competition of online marketing has made it mandatory for businesses to meet the surging demands of contents by audiences. The delivering of the individualized content to each and every user based on their preferences and personalization is the utmost need of time. Not all companies at this moment are capable enough to deal with this, and the one who is executing this, are deploying content at higher content production costs. In this situation, the only solution is to incorporate user-generated content (UGC) into the marketing mix.
Livefyre is the latest Experience Manager tool added in AEM, which helps you to investigate everything shared on the web and to create a constant flow of high-quality content on your website. It can be used to share the real experiences of real people, increase engagement and to build loyalty and drive business impact. Adobe’s UGC platform comes with the
Experience Manager Livefyre, that can be integrated into the Adobe stack. This integration of the Livefyre can meet the content production demands by injecting authentic and personalized UGC across the entire customer journey.
Let’s understand the working of this Livefyre Integration To The Adobe stack:
1.
Direct integration between Livefyre and AEM Assets
The direct integration between Livefyre and AEM Assets provides the creative teams a holistic view of all available content within the Assets interface. The integration with AEM Sites makes it possible to publish contents on various web pages. Also for both online and physical locations, the Livefyre and AEM Screens integration makes it possible for visitors to experience a consistent brand experience.
2.
Finding And Curating Content By The Use Of Machine Learning
The machine learning and automation features in Livefyre enables businesses to efficiently manage what’s happening on different web pages. One can take content to market at a much faster rate and drive down costs by the streamlined workflows that speed up the process of getting rights to publish content. Further, Livefyre comes with the Smart Moderation features which automatically flags questionable content at the beginning itself. This enables the moderators to review the contents and with the help of machine learning, the software continuously refines and find explicit and offensive content.
The integration of the Smart Tags, in the Adobe Experience Manager, powered by Adobe Sensei in Livefyre can take content curation to a whole new level. The Smart Tags has made it possible to automatically tag images with attributes, enabling users to easily find whatever they are searching.
3.
Personalize UGC Experiences With Adobe Target
The Adobe Target and Livefyre integration enables the delivery of free-flowing relevant user-generated images, videos, and comments, which are personalized for each and every user. This feature has many alluring aspects, like:
a) Personalized Commenting In Communities
By adding Livefyre’s sidenotes and comments to the communities, one can create an interactive community, where readers can ask questions and make comments, making it a very useful and relevant experience to website visitors.
b) Create Real-Time Buzz With Your Contents At Conferences
One can create dynamic press room or blog to highlight the features of product or company announcements in real-time by the use of Storify2 and Livefyre’s live blogging app. Furthermore, AEM Sites integration can quickly and automatically deploy live blogging to multiple web pages. This very feature was used by Intel at the CES 2017 (Consumer Electronics Show) to demonstrate their products.
c) Personalized Experiences To Drive Revenue
The pairing of UGC with relevant calls to action, so as to guide customers during their purchasing journey, can improve conversion and revenue. Also, with the help of Adobe Target, the UGC experiences for each audience segment can be personalized. One can check this webinar by T-Mobile, in which they used UGC to power their winning switcher campaign.
These are only some examples stating how powerful marketing tool UGC is. And as an online business owner, one must have the right knowledge of marketing tools along with the right implementation methodology. The correct selection can keep you stress-free while executing personalization and automation to meet the user demand. In your marketing voyage, the Adobe stack that comes with Adobe Experience Manager having Livefyre can be a great assistant.
NextRow is a renowned Adobe Solution partner and can help you in integrating Livefyre with other Experience Cloud solutions. Contact us at +1-847-592-2920, to learn more about Experience Manager Livefyre and for more details visit our website.
A Detailed Overview of Slightly Language
SIGHTLY (A BEAUTIFUL TEMPLATE LANGUAGE)
Sightly, Beautiful Markup Language and More
Sightly is a Hypertext Template Language (HTL) specifically designed for AEM. It was introduced with AEM version 6.0 about two years ago. Now-a-days, slightly has been gaining importance because of its various advantages for developing websites in AEM.
Although languages like of JSP (Java Server Pages) and ESP (ECMA Script Server Pages) serve well for website development in AEM, sightly is emerging to be a preferred templating language for HTML because HTML developers can participate better in AEM project without any JAVA knowledge.
In addition, this language seems pleasing to the eye of any web developer. It is made easily understandable with its simple syntax, and efficient maintainability. Therefore, it is called “Sightly”.
Sightly, is also referred as server side template language, it enables development teams to distinctly separate logic and markup. This flexibility allows faster and easier CMS customization. It helps businesses to pursue not only broader but also comprehensive business strategy and faster time to market.
During the last two years, with an increased support base for tools, Sightly has become more performant and standardized. After successfully completing the migration of a site to AEM using Sightly, one can view results such as a reduction in developments efforts over traditional JS based development. The code came out to be cleaner and the maintenance is much easier. This blog describes Sightly’s advantages, its implementation factors, and its Cost reduction features.
The following are the main advantages of Sightly.
Advantages
- New AEM developers have a shorter learning curve
- Easy to maintain the project with cleaner code
- Introduces, the new way of component development
- Elimination of UI/AEM integration issues
- Increased developer productivity
- Secure: URL Externalization and XSS Protection
- Finally helps you forget about JSP Scriptlets, with embedded business logic.
- Offers pure view and help move the business logic to Java classes (externalizing the business logic)’
- Addresses problems in AEM such as lack of separation of concerns
On the other hand, sightly shows its significance in enabling Java developers to focus on the backend code independently. This specific feature distinguishes sightly from other templating systems where Java developers should have little front-end knowledge of integration. Therefore, sightly often reduces coordination issues, as the frontend development might not be a primary skill for every Java developer.
SAMPLE CODE IN JSP
<% %>
<%@include file=”/libs/foundation/global.jsp”%><% %>
<%@page session=”false” %>
<% %>
<cq:includeClientLib css=”test.css” />
<cq:includeClientLib js=”test.js” />
<div>
<h1>Hello World!!</h1>
<h2>I am using JSP!!</h2>
<h2>properties</h2>
<%
String title = properties.get(“jcr:title”, “default title”);
String text = properties.get(“jcr:text”, “default text”);%>
Title: <%= title %> <br/>
Text: <%= text %> <br/><br>
<h2>currentPage</h2>
Title: <%= currentPage.getTitle() %><br>
Name: <%= currentPage.getName() %><br>
Path: <%= currentPage.getPath() %><br>
Depth: <%= currentPage.getDepth() %><br>
<h2>currentNode</h2>
Name: <%= currentNode.getName() %><br>
Path: <%= currentNode.getPath() %><br>
Depth: <%= currentNode.getDepth() %><br><br>
<c:if test=”${properties.name}”>
<c:set var=”test” value= “target=’_blank’”/>
</c:if>
<a class=”btn btn-primary-outline”
href=”<%=testurl%>”
${test} role=”button”>${properties.name}
</a>
</div>
SAMPLE CODE IN SIGHTLY
<div>
<sly data-sly-use.clientlib=”/libs/granite/sightly/templates/clientlib.html”
data-sly-call=”${clientlib.js @ categories=’clientlib1,clientlib2′}”
data-sly-call=”${clientlib.css @ categories=’clientlib1,clientlib2′}” >
</sly>
<div data-sly-include
script=”/libs/foundation/global.jsp”>
</div>
<h1>Hello World!!</h1>
<h2>I am using Sightly!!</h2>
<h3>Properties</h3>
<!—fetch property values from the dialog — >
<p>Title: ${currentPage.properties.jcr:title}</p>
<h3>Page Details</h3>
<p>Title: ${currentPage.Title}</p>
<!—fetch property values with currentPage object– >
<p>Name: ${currentPage.Name}</p>
<p>Path: ${currentPage.Path}</p>
<p>Depth: ${currentPage.Depth}</p>
<h3>Node Details</h3>
<!—fetch property values with currentNode object– >
<p>Name: ${currentNode.Name}</p>
<p>Path: ${currentNode.Path}</p>
<p>Depth: ${currentNode.Depth}</p>
<!—testing if the properties are present (similar to if condition)– >
<div data-sly-test.valid=”${pageProperties.name}”>
${pageProperties.name}
</div>
</div>
Tricks with Sightly:
- How to print Url of the current page in sightly: Although we can fetch URL using javascript model, it is preferable to directly use it in sightly as it improves the performance.
Example: You can print the URL using ${request.requestURL.toString} Url can be composed and printed as below:
<sly data-sly-test.scheme=”${request.scheme}”/> <sly data-sly-test.servername=”${request.serverName}”/> <sly data-sly-test.serverport=”${request.serverPort}”/> <sly data-sly-test.val=”${request.requestURI}”/> ${scheme}://${servername}:${serverport}${val}
Access Values from a String[] in Json:
Example:
<div
data-sly-use.multi=”${‘com.project.sightly.MultiField’ @ json=properties.items}”>
<div data-sly-repeat=”${multi.values}”>
<h2>${item} – ${item}</h2>
</div>
</div>
Where MultiField is a class and uses an identifier called ‘json’ to map the properties stored in an Jason object.
multi.values – will fetch all the keys from the json object.
Item: will iterate key value pair within the json object.
Coding Standards in Sightly
Sightly allows the developers to leverage its wider choice of a global variable as well as flexible Use of API. It also enables the developers to prepare customized data for the templates utilizing both Java and JavaScript.
Sightly Implementation Overview
Beyond the MVC (Classic Model-View-Controller), the above architecture does have the following characteristics
- Presence of a sling post servlet does mean that no code must be written to handle POST requests
- The client not necessarily should know about structuring data for the Sling Post Servlet
- A simple server-side JavaScript file is essential to trigger the specific template handling that part of the view. To retrieve the HTML fragment of what must be updated on the page.
Few points to know about Sightly, ranging from technical odds and ends to more general considerations
Integrations with sling models:
Sightly does not require Sling models, there are different ways to get your logic into Sightly. Still, the sling models are considered as the perfect way to set the Java logic up.
Templates-Define reusable:
In Sightly, Templates tend to define re-usable and potentially recursive methods that can be defined locally or in separate files.
Separation of concerns:
Separation of concerns defines the separation of the frontend from the business logic in different files. Initially, business would require writing all templates in JSTL, because JSP logic tends to sneak into the views. Another disadvantage is, JSTL can become rather unwieldy and produce lots of clutter. This was very much reduced in Sightly and it helps bridge the gap between back end as well as front-end development.
Localizing Terms:
Sightly localize terms provided in dictionaries in an easy and beautiful manner by just adding the context i18n.
Version diffing:
This is a core feature of AEM and it is used on many websites. It does include HTML to highlight changes in different versions of the page directly in the author environment. By inserting HTML into text, the text becomes enriched with content, that is automatically escaped by Sightly. So, one must skip all encoding, which again takes away a core feature of Sightly. Abode is working to find a solution.
Easy to adopt:
Sightly is easy to adapt because it allows the front-end developers to directly work with templates in Abode Experience Manager and not have the visual clutter of JSTL or the power (and responsibility) of JSP. Thus, it becomes much easier to use it, in all the projects for web development on AEM.
How to add
Help Reduce Total Cost of Ownership(TCO) and Time-to-Market”
Sightly is preferred by numerous technical managers because of its templating system that allows to separate the business logic from the front end markup. It also enabled the users to leverage JCR’s extensive features for flexible sling integration.
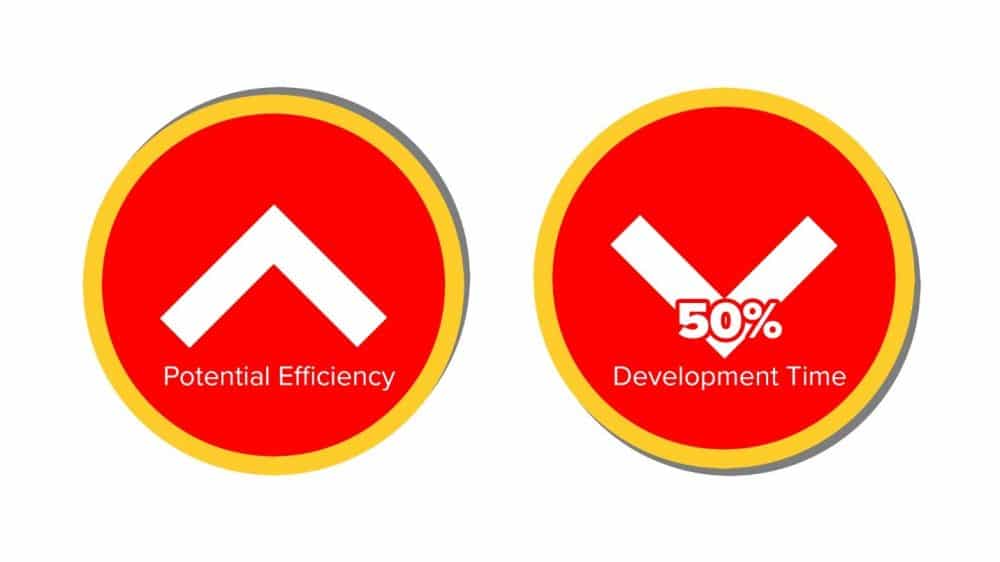
Potentially 25% of the development cost is saved utilizing Sightly.
The front-end designs need not be implemented separately from the AEM project anymore as Sightly(HTL) provides and environment for HTML developers to work directly on HTL template without any back-end knowledge. The java development is benefitted as Sightly provides a simple to use USE-API to separate logic from the markup.
In conclusion, Sightly templating engine is a powerful, versatile tool with many benefits for web development in AEM platforms. Additionally, it improves time-to market and reduces the Total Cost of Ownership of Your AEM 6.x projects. It also helps in introducing a clean separation of concerns and prevents developers from writing business logic and the markup, thus reduces the load time of the webpage.
How to Get the Most Out of Marketing Automation?
Marketing Automation is not magic. But mastering the automation process to send the right message at the right time to the right customer is what distinguishes the pros from the rookies.
Most marketers agree, they feel guilty for not using the Marketing Automation platform to the fullest.
Below you will find five planning tips, which will help you get the most out of your Marketing Automation Platform.
- Personalize customer’s journey
Automating your marketing efforts does not mean continuously pumping out scheduled emails. Automating your marketing is more about personalizing your content and catering to each individual customer needs. Automating your marketing opens up time for you to look at bigger things and it allows you to be present throughout the customer journey instead of just nudging them towards conversions.When you start sending targeted, and personalized messages to your customers at specific junctures in their purchase journey (from the time they have first logged in to the follow up process, even after, they have stopped purchasing from your website).
This would help in acquiring, activating, retaining and winning back former customers. The marketing campaigns, with triggered emails are highly relevant and they keep your leads engaged and ultimately help generate higher ROI.
If your business knows how to delight your customers throughout
the lifecycle of a lead, whether by sending a sincere thank you email correspondence or by sending a milestone email for a customer’s anniversary or birthday. Thus, by sending relevant and chronological messages, businesses gain/acquire the ability to build strong relationships with their customers.
- Your segments must be updated in real-time
True personalization cannot happen without segmentation. Creating segments, which are not updated in real time would only pave way for untargeted messages. To automate email messages based on a customer’s behavior, you should ensure your segments are updated in real time.For example, when a customer, whether new or existing has abandoned his/her cart prior to a checkout cart recovery message would be triggered to him/her. However, if he/she has returned and makes a purchase before the first email in your cart triggered emails is fired, then automatically he/she should exit the cart abandoner’s segment. But in case of absence of segments, that are not updated in real time, the above scenario cannot be averted.
- Use Omnichannel messaging
The consumer is paying little or limited attention. For single purchase, we find numerous digital channels involved and buyer cycle is complicated. Businesses running an Omni channel campaign could fall through the cracks if their customer data is stored in silos. Hence, businesses must have a customer-centric approach, and to achieve it, they need to have single customers view across all channels. - Begin small and as you progress, automate more
Marketing automation tools provide many possibilities and it is difficult not to get carried away. And by trying to automate all at once, might yield less effective results. Additionally, it can be very difficult for businesses to judge the effectiveness of varied campaigns.So, start small, keep your focus on low hanging fruits first; this is the best marketing automation strategy. For example, shopping cart abandonment is one of the biggest reasons for lost sales. And still, we find most of these retailers do not have well-crafted email strategy for cart recovery. If your business lacks a proper cart recovery program, then your first goal should be to implement one. By doing so, businesses would find it easier to track their progress, and they will be able to learn to optimize as well.
Marketing Automation for small businesses should follow these tricks, to speed up gradually. They need to identify what they require to automate next. Their approach to automation would help determine the level of success they achieve. In the era of customer-centric approach, there exists no shortcut for success.
- Harnessing data to achieve growth
You cannot manage what you cannot measure. In the past, marketing has been mostly data driven, but today’s marketers have access to an unprecedented volume of customer data to sift through in real time.In the present era of big data, marketers need to track how and when customers are interacting with their campaigns, to optimize the process and send relevant content. However, most marketers are failing to use meaningful insights.
McKinsey, a global institute, has conducted research and found that these companies with data at the heart of their marketing, as well as sales activities, experience only 15 to 20% increase in Return on Investments (ROI). Hence, marketers should learn to leverage this available data; only then will they be able to improve conversion.
Do you wish to use Marketing Automation? Try Getting in touch with us we would be happy to assist you.
How to make your AEM sites Web Accessibility Compliant?
Introduction:
This is a brief overview of the Web Accessibility features for websites developed with Adobe Experience Manager. The most commonly faced accessibility issues on AEM developed websites are discussed herein, along with several examples of the best approaches you should take to resolve these issues.
Why Accessibility is important for your site?
Developers tend to assume that websites are accessible by everyone who can see and use the pointer interface (for example, mouse pointer on the screen and touchscreen experience); however, users with any disabilities may find a website difficult to navigate. The goal of a website developer is to make this less challenging of an experience for the normal, everyday user. Websites should be user specific when user experience is taken into consideration and must accommodate individuals with impairments, whether they be situational, temporary or permanent. Therefore, developers must be very specific when writing the website code to achieve accessibility standards.
How to find Accessibility recommendations and implement in AEM?
Web accessibility evaluation requires a combination of semi-automated evaluation tools and manual evaluation.
Your website can be tested for web accessibility with one of the following tools:
- WAVE Evaluation Tool Please click on WAVE tool plugin to download this plugin on Google Chrome. To test your websites with the WAVE tool on browsers other than Google Chrome, please click here and follow the instructions.
- NVDA Screen Reader (NonVisual Desktop Access) Please click here to download this software.
Working with WAVE Tool on AEM sites:
We use WAVE software to test the accessibility errors on AEM sites. WAVE is an open source web accessibility evaluation tool available as a plugin download only for Google Chrome. Once we enable this tool on any published site, we can observe/view the red tags on the site. These tags describe the type of accessibility error which has occurred. The following examples address some of the commonly occurring web-accessibility issues that users may experience. Their respective solutions are followed by the issue explanation.
How to use WAVE tool on your AEM website?
A simple form component is included on the geometrixx-media website and WAVE is activated on the published page. It is important that you remember to switch to Preview Mode to enable WAVE to test on author instance.
Once the WAVE tool is enabled, it addresses the accessibility errors on the page.
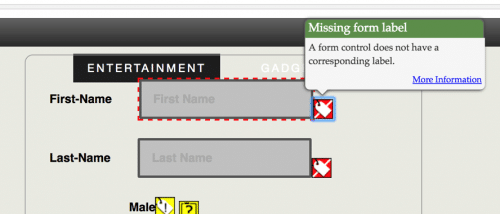
For example, in this case, the error was as follows:
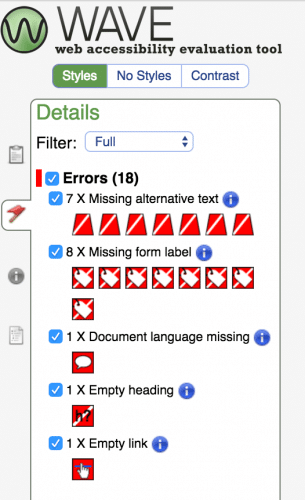
This diagram shows the approach of WAVE in addressing the errors on the page.
WAVE not only displays the web accessibility errors but also suggests solutions to solve them. However, most of the suggestions are vague and may not guide the developer into attaining an immediate solution. Therefore, the following explanation has been provided, in brief, to overcome accessibility issues and gives you an idea of the methods you must implement to approach these errors.
Click on the “i” icon to view the information related to the errors.
EXAMPLES OF THE FEW MOST COMMON ACCESSIBILITY ISSUES:
A form control does not have a corresponding label: The solution for this error requires the label attribute to the form element. Label attributes identify all form controls like text fields, radio buttons, checkboxes and drop-down menus.
Approach: <label> tag can be included to identify the form controls as follows:
A) Using label
<form>
<label for= “my-name”> Name: </label>
<input type=”text” id=”my-name”>
</form>
“for” should be addressing the ID used for the referral tag.
B) Hiding the label element
When the label should not be displayed on the page, CSS/WAI-ARIA attributes can be used to resolve this issue.
<form>
<label for= “my-name” class=”hide-label”> Name: </label>
<input type=”text” id=”my-name”>
</form>
Although the styles for the class can be configured as per the requirement, to hide the label it can simply be
.hide-label {
display: none;
}
C) Using aria-label attribute
This approach is very accessible by screen readers. However, aria-label does not convey the information to the visual users like the title attribute option.
Code:
<form>
<input type = ”submit” id=”my-name” aria-label=”submit button”>
</form>
Input field is missing a description: Every input field requires a description so that any area on the page is accessible for visually impaired website visitors. Approach:
A) Using title attribute
Using a title attribute can visually display the description of the field when the element is hovered over by the mouse pointer.
Example code:
<input title=”Please enter your first name ” type=”text” name=”first-name”>
NOTE: This approach is generally less reliable to be used as a label (previous example) because some of the screen reader’s assistive technologies do not interpret the title attribute as a replacement for the label element as title attribute frequently used to provide information of the field. Therefore, this method is not recommended to resolve label accessibility error.
B) Using aria-label / aria-labeled by
Aria-label attribute can also be used to provide the description of a field. This can be done when the description is not needed to be displayed for the screen readers but still serves the purpose.
Example code:
<input type=”submit” id=”submit-button” aria-label=”submit-button”>
(Or)
aria-labelled by can address the Id of the group to describe the purpose of the field.
<div id=”test”>Testing Accessibility</div>
<div>
<div id=”One”>One </div>
<input type=”text” aria-labelledby=”test”/>
</div>
CLICK ON ARIA ATTRIBUTES TO UNDERSTAND MORE . Missing Button in form: Every form requires a submit button, which is a very important element of the form. The following approach can be implemented for form buttons to be accessible:
Approach:
A) Add correct type in the input field
Example code:
<form>
<input title=”search” type=”submit”>Search</input>
</form>
“type” attribute should be set to “submit” to enable the screen readers to understand the
B) Using role and wai-aria attributes
Example code:
<form>
<input role=”button” type=”submit” aria-pressed=”false”></input>
</form>
WAI-ARIA role for the drop down button in a form The correct Aria-role attributes should be used for the form fields. The drop down functionality roles may vary depending on its purpose. The following example is the role that should be used for a form element <select> which displays all the countries in the list.
Example Code:
<select role=”listbox” name=”state”>
<option></option>
<option></option
…..
…..
</select>
CLICK HERE TO GET MORE INFORMATION ON ROLES. Image missing alternative text Image link requires an alternative text describing the purpose of the link. Every image that is used in the page should be presented with an alternative text because the users will understand the purpose of the image with or without the image being displayed on the page.
Adding the alternative text in the image link that states the topic of the page can resolve this issue.
Approach:
Example code:
<a href=”/home/personal/mobile-app.html” class=””><img src=”/content/dam/geometrixx-media/sample.png”
class=”” alt=”Sample image for the accessibility test”></a>
The above description of the image within the alternative image attribute (alt) should be meaningful and precise to the images used within the respective tags. Avoid using <bold> tags The ‘bold’ tag is used to highlight text. Consider the following:
The text should be emphasized semantically, use the ‘strong’ tag instead.
If the text is a heading, an ‘H’ tag (such as H1, H2, H3…) should be used instead.
If the text is highlighted as a visual effect, CSS should be used to do this.
Approach:
A) Using Strong tags:
<strong> This is a way to avoid using bold tags </strong>
B) Using appropriate styles:
<p style=”font-weight: bold”>This is another way of avoiding the bold text</> Avoid using <font> tags The font tags should be avoided to style the text on the page. Many authors tend to use font tags to configure the content on the page through dialog box; this approach will be the root cause of inaccessibility of content on the page for a visually impaired visitor.
Approach:
Example code:
<font color=”#fff”>This is an example</font>
The above content should be replaced with the appropriate tags and the styles should be given separately as follows.
A) Using Appropriate tags with styles:
<p style=”color: #fff”>This is another way of avoiding the bold text</p>
Presentational Attributes used error:
In the event that presentational attributes such as ‘border’, ‘align’, or ‘bgcolor’ are used then CSS should be used for styling instead.
It is important to review these issues and determine if they can be fixed by moving the presentational attributes to your CSS. Furthermore, it is not always practical to make these changes; however, they should be made whenever possible and considered a best practice. Approach: Inline styles can be included for fixing this issue when the issue has occurred because of the dialog box content configuration.
Example code:
<iframe style=”height: 200px; width: 200px; border: 0px”>”this is an iframe”</iframe>
Conclusion: As clients focus more on making websites accessible for everyone, many of you will start working on accessibility issues sooner than later. I hope this blog helps you “jump start” the process of finding and implementing accessibility items for websites.
Developing and Authoring a basic mobile application using adobe AEM 6.1
How does Adobe Experience Manager Apps build and deploy?
- AEM integrates with the Adobe PhoneGap Build service to simplify the application build and deploy process.
- ContentSync enables users to download page and content updates Over-the-Air (OTA) to their devices without having to re-install the application or download from the appStore, Google Play, or other app sources.
- Adobe Analytics is fully integrated into AEM apps and allows detailed tracking of distribution, geolocation, operating systems, devices, click-streams, time in app, crash reports, iBeacon tracking and more.
Why should we use Adobe Experience Manager Apps?
Adobe PhoneGap Enterprise uses AEM as a platform and, leverages both Apache
Cordova and Adobe PhoneGap to create and manage content-rich cross-platform mobile applications that take full advantage of both HTML and Native Device Features:
- Manage all your company’s mobile apps in one place. Whether they’re 100% native or a hybrid application, they can be managed within PhoneGap Enterprise.
- Review apps in development and staging environments without the complexities of provisioning profiles and the extra effort to build and upload your app for sharing. See the PhoneGap Enterprise App in both the AppStore and PlayStore for how this is easily done.
- Use the AEM page authoring environment to create and manage rich content for your apps, including single page app (SPA) reference implementations.
- Use the HTML with Adobe PhoneGap to create a mobile app container, page templates and components with device-native capabilities (including for example, native transitions between pages for a smoother and more performant experience).
- Build and manage mobile content into new or pre-existing native apps through Cordova Web View integration with Adobe Experience Manager (AEM).
- Share content across all delivery channels including, web, mobile-web, mobile-app, and print. Content is managed within Assets and through Adobe S7 capabilities one can very easily stream (online) or package (offline) images and videos targeting all viewports (size and quality of images and video to support all screen sizes and bandwidth limitations).
Below are the steps to create a basic sample app in AEM: –
For creating a basic app you can start with basic starter kit provided by Adobe in the link here
All the requirements and prerequisites are stated in the above link: –
After cloning the repository you can customize the app name and title: –
For installing the project onto the AEM instance: –
After installation onto AEM instance you will find your project in apps folder: –
Folder structure for mobile apps in AEM
Content for the app should be in content/PhoneGap folder for best practices
You can author the created AEM app from Mobile Apps list console
From the AEM Mobile Apps Control Center, you can manage your application, view statistics, build, deploy and manage your mobile app content.You can drill into each tile in the Control Center to view or edit details by clicking the ‘…’ in the bottom right corner.
The Manage App Tile displays your applic ation icon, name, description, supported platforms, call home for updates URL and version information. You can drill into this tile to edit and maintain the PhoneGap Application Configuration (config.xml) and, prepare your application for submission to the various application stores for distribution.
Content can be created, updated and deleted in AEM Apps in much the same way you do the same within AEM Sites. The Content Tile displays the number of pages of managed content and last modified. You can drill into content to create, copy, move, delete and update pages by clicking on each record in the tile.
Apart from managing content from Mobile App List Console you can also manage it through crxde Lite
The PhoneGap Build Tile connects with the PhoneGap URL to build and host remote builds.
To connect to the PhoneGap you need to configure this tile by creating or using existing Adobe ID
After configuring you can build the app remotely or build by downloading the source
Once built remotely, the build is made available either as a download or directly to your device via a QR code.
Master Mobile Apps Domination With Adobe Experience Manager
The usage of mobile apps in smartphones and on tablets dominated the usage of web browsers globally. Most of the smart users prefer to use mobile apps than browsing on mobile websites. According to “The US Mobile App Report” released by comScore in August, 2014, mobile app usage among Americans increased to 52% of the total internet usage in 2014, which is a rise of 24% compared to the usage in 2013. The report also said that almost 57% of all the smartphone users in the US use mobile apps on a daily basis.
Figure1: The US Mobile App Report showing comparison of usage of mobile apps in the US between 2013 and 2014.
The usage of mobile apps is not only in the Americas but also with most of the smartphone users across the globe. This change in the users’ mindset to prefer mobile apps over mobile sites is because of the rich and personalized experiences provided by the apps compared to mobile sites. This scenario clearly shows that organizations must deploy mobile apps to increase customer engagement. Developing and launching might be easy but providing rich and personalized experiences to customers using these apps involves implementing a robust platform which can deliver personalized mobile app experiences. Adobe Experience Manager is in the top of the list because it has an integrated mobile app development platform (MADP) that bridges the gap between developers and marketers.
Adobe Experience Manager Apps – a perfect solution for marketers
Adobe Experience Manager Apps is an integrated MADP platform that enables organizations to design and develop new apps, individualize content and deliver them across multiple platforms including iOS, Android and Windows. It is developed to allow marketers to work collaboratively and offer high end mobile app experiences for target audience(AAM).
With AEM Apps, marketers can:
- Enhance app experience consistently: Using the drag-and-drop interface in the platform, marketers can update the app experience without any assistance from IT teams. The platform enables the app to review the updates to the app and instantly publish them. So, there is no need for users to update the app manually.
- Create platform independent apps: Marketers can develop a single app for one platform and use that design to deliver the app across different platforms. They can also increase updating time by including cross-platform content in their native apps.
- Personalized apps for brands: Marketers can develop new apps for every brand and for every marketing campaign in each region. They can also author content between apps to maintain brand consistency.
- Analyze app performance: Marketers can analyze the performance of their apps by using the pre-built Adobe Mobile Services SDK (Analytics) integration.
Figure2: A sample screenshot of creating an app using Adobe Experience Manager
Apart from these features, AEM Apps enables developers and marketers to use Adobe PhoneGap Enterprise, a cross-platform app development solution, to develop and maintain hybrid apps. This integrated solution enables marketers to manage the website content on their apps.
NextRow’s team of AEM developers/architects has the expertise in mobile app development. They have developed several mobile apps that are compatible with different platforms including Android, iOS, and Windows. At NextRow, we support our teams by offering them the freedom and environment to make use of their expertise in implementing projects resulting in quality deliverables. That is why we maintain consistency in project delivery adhering to budget, schedule, and quality. Anything from the creation of mobile apps, to expanding the app to other platforms or developing a new product, NextRow is just a click away to serve your needs.
Why Do Adobe CQ5/AEM Implementations Fail and How to Prevent It?
Adobe CQ5/AEM is arguably the industry-leading WEM platform. Implementing Adobe CMS requires careful planning and masterful execution. The process, from planning to launching Adobe Experience Manager, might encounter several obstacles like any other implementation. These problems may have the potentiality to derail the implementation process with increased costs and performance issues, if not carefully executed.
Implementing Adobe Experience Manager (to that fact, any CMS), involves careful planning, involving all stakeholders in the project, in defining project goals and requirements. A project can fail for various reasons, most notably communication gaps among key stakeholders. Engaging all stakeholders including marketing teams, IT teams, infrastructure team is the key for AEM implementation success. Below are some of the factors that may lead project implementation to failure if there is no proper alignment among your teams.
- Gathering project requirements: This is the first phase of a CQ5 implementation project where certain fundamentals like schedule, budget, and quality are defined. For this, all the teams should be involved and their opinions should be taken into consideration before starting the project. Creating a unified user experience instead of breaking down into multiple silos is critical for marketing teams to understand the complete user behavior and to offer a better user experience.
- Understanding size and complexity: Before implementing a CQ5 project, understanding the size, complexity and capabilities of the system will help an organization to define the scope of the project. So, every member involved in the implementation should understand the scope of the project to avoid confusion and incorrect assumptions, which may lead to project failure. Remember that complex projects like Adobe CQ5 implementations may tend to have changes even after the launch.
- Divergent strategies: When an organization plans to implement a project, say using CQ5, opinions of all the teams (marketing, IT, and more) should be taken into consideration. Each team has its own strategy based on their area of expertise and will differ with other teams. The outcome of this will be undefined project requirements, inadequate strategies and more, which leads to project failure.
- Disorganized roles/responsibilities: Allocating project roles to in-house teams is a key factor in defining business requirements for the project. These roles should be defined clearly and ensure they are known to everyone in the project. And each member of the project must understand their responsibilities in the project to avoid confusion. If these roles/responsibilities are not organized properly, then a member or team involved in the project can be the reason for project failure.
- Theory vs Reality: While implementing a project, an organization should consider the environment in which the end solution will be run and the end users who will use it. This will help organizations to determine the requirements for the project and to launch it as per the schedule. Projects that are implemented without any of these requirements will tend to fail in reality.
- Engaging a right partner is the key: It is quite impossible to hire all FTEs for the project implementation, especially when it is a new implementation. It may take time to build the expertise internally and build the team. While you do that, engage a qualified Adobe partner who is small but nimble to gain maximum efficiency in the deliverables.
Figure1: An example screenshot of a successful CQ5 implementation
Why engage an outside partner for implementations?
Do you have enough talent in-house? That should be the first question to ask yourselves. When it is a new implementation, I bet you may not have much talent in-house. While you breed your talent, you can’t put the project on hold, rather engage an Adobe implementation partner like NextRow to implement your CQ5 project. NextRow can bring in a different perspective to your team that will enable you to think outside the box to achieve best results.
NextRow will be a perfect partner for your outsourcing projects because we can guide you with our unique CQ5 services from strategic consulting and implementation to deploying the platform and offering training. As an Adobe solution partner, NextRow has Adobe certified CQ5 developers/architects to implement your Adobe Experience Manager projects leveraging their deep experience in working with the platform. To ensure strong relationship with our clients, we offer flexible business models including Fixed Price Model, Time and Material Model and Hybrid Business Model.
As a trusted service provider, we also offer our clients maintenance and support services (fixed development hours and L1/L2/L3 support) for your Adobe Experience Manager platforms. According to Adobe, a CQ5 platform must respond to 70% of the requests in less than 100ms; 25% requests in less than 100ms-300ms; and no page should take less than 1 second. So to monitor your CQ5 instances, NextRow has developed a tool, Remote Monitoring Center (RMC). This cloud-based solution will monitor your CQ5 platforms in multiple servers and notifies you of any issues in the platform before your audience notice them.
Figure2: A screenshot of NextRow’s RMC tool dashboard monitoring a CQ5 platform
Marketers Latest Strategy for Success – Adobe CQ5/AEM
As customer expectations are reaching higher altitudes consistently, marketers are looking for ways to optimize their digital platforms on a high priority in order to meet their customers’ needs. For this, marketers need to have the right strategies to offer customer experience and need to break organizational barriers. They must adopt and leverage high-end digital experience delivery platforms to stand out from the competition.
According to “The Forrester Wave: Digital Experience Delivery Platforms, Q3 2014” report, Adobe is in the top place in the list of companies that offer digital experience delivery platforms. The reason behind this is the Adobe content management system, Adobe Experience Manager. Adobe AEM enables marketers to expand their brand presence by delivering personalized web experiences to their customers across different digital devices and channels.
How Can Marketers Benefit from Adobe AEM?
Using Adobe Experience Manager, marketers can:
- Design and manage multiple sites with single instance using the Multi Site Manager (MSM).
- Integrate the platform with Adobe Marketing Cloud to optimize the platform and reach more target audience.
- Design and optimize digital marketing campaigns using the Adobe Campaign, part of the Adobe Marketing Cloud.
- Integrate the platform with other marketing and e-Commerce solutions to convert leads into sales.
Adobe AEM Multi-Site Manager (MSM):
This functionality of Adobe CQ5/AEM enables marketers to automatically create and manage multiple sites such as multinational and multi-lingual. This functionality allows marketers to maintain corporate branding and increase their brand’s digital presence globally across multiple channels. They can also offer access to digital assets of the brand as a common library using the Digital Asset Management (DAM) functionality.
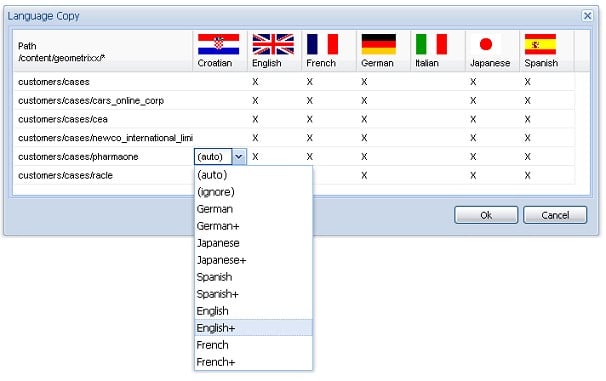
Figure 1: A screenshot showing the capabilities of the AEM Multi Site Manager
AEM, Adobe Marketing Cloud Integrations:
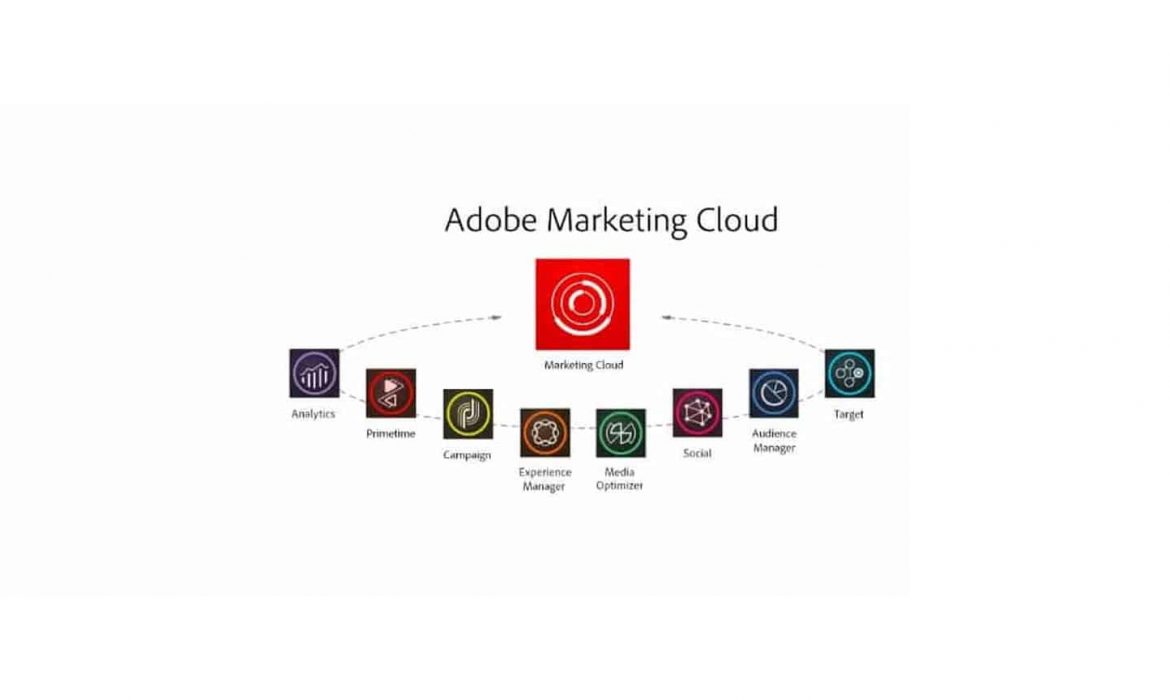
Adobe Experience Manager can be integrated with other Adobe Marketing Cloud solutions to optimize the platform and offer personalized experiences to customers.
Figure 2: Integration of Adobe Experience Manager with Adobe Marketing Cloud
Marketers can integrate Adobe AEM with:
- Adobe Scene7 to synchronize digital assets between AEM and Scene7 by creating a synchronization folder in both platforms. Marketers can also view published AEM assets in different viewers like Basic Zoom, DHTML Flyout Zoom, Flash Flyout Zoom, Video and more.
- Adobe Analytics to track the visitor data from website and drive traffic using conversion variables. Marketers can also map author and publish modes in AEM with different report packages.
- Adobe Social to store the data of social communities in the cloud. This enables marketers to use the benefits like optimized cross-channel moderation, updating data from communities to the cloud. Even though the data is in the cloud, marketers can control author and publish instances from the platform. Marketers can also moderate user data using Unified Moderation and Trusted User Moderation features of Adobe Social.
- Adobe Target to create campaign using AEM and can manage them using Target. Marketers can implement campaigns on landing pages, can perform A/B testing. They can also track user generated data, access it to optimize the platform and increase conversion rates. Based on the data, they can create and run digital campaigns.
Adobe Campaign:
Adobe Campaign (formerly known as Neolane) enables marketers to design and automatically run marketing campaigns, from one-off campaigns to one-to-one messages, across different marketing channels. This allows marketers to establish individual profiles for customers to know their preferences and offer them before they request it.
- Integration with AEM: The integration of AEM with Adobe Campaign allows marketers to leverage content from AEM authoring environment to design inbound and outbound campaigns. Marketers can use the marketing assets in AEM to publish in a campaign and run it across different channels using Adobe Campaign. Marketers can also optimize customer experiences by engaging in personalized communications with them using customers’ profiles shared on AEM and Adobe Campaign solutions.
AEM Integration with Marketing/E-Commerce Tools:
By integrating Adobe CQ5/AEM with marketing/e-Commerce tools, Marketers can convert leads and lists into sales. Some of these integrations include:
- ExactTarget integration with AEM will enable marketers to optimize digital marketing campaigns through emails and newsletters by distributing them in ExactTarget platform.
- Hybris integration with AEM will allow marketers to listen to their audience responses by connecting and accessing data from an e-Commerce platform. This will allow them to market their products.
AEM can also be integrated with other marketing/ e-Commerce tools like Eloqua, Marketo and Endeca to optimize online business.
NextRow is system integrator and an Adobe solution partner that offers web experience and digital marketing services using Adobe Experience Manager. NextRow’s services include consulting, implementation and upgrading Adobe CQ5; migrating other CMS platforms into AEM; AEM maintenance and support services for existing Adobe AEM platforms; and integrating AEM with other tools of Adobe Marketing Cloud as well as third-party applications. NextRow is also offering Adobe Experience Manager integrations with different marketing tools such as Eloqua, Adobe Campaign, Hybris, and more.
How to Get Started with AEM Components in Eclipse?
Below are the steps to set up workspace and start development of Adobe CQ5 components in Eclipse:
Prerequisites:
- CQ5 Installation
- File Vault (VLT)
- Eclipse
- Apache Maven
Step 1
- Create a project in CQ5 using CRXDE LITE
- Under the /apps folder, create the nt:folder myApp.
- Under the myApp folder, create the nt:folder components.
- Under the myApp folder, create the nt:folder templates.
- Under the myApp folder, create the nt:folder install.
- Click save button after creating the above things.
Step 2 – Installing File Vault (FLT)
- In our file system, go to <cq-installation-dir>/crx-quickstart/opt/filevault. The build is available in both tgz and zip formats. Extract either of this two archives.
- Add <cq-installation-dir>/crx-quickstart/opt/filevault/vault-cli-<version>/bin to your environment PATH so that the command files vlt or vlt.bat are accessed as appropriate. For example, <cq-installation-dir>/crx-quickstart/opt/filevault/vault-cli-1.1.2/bin
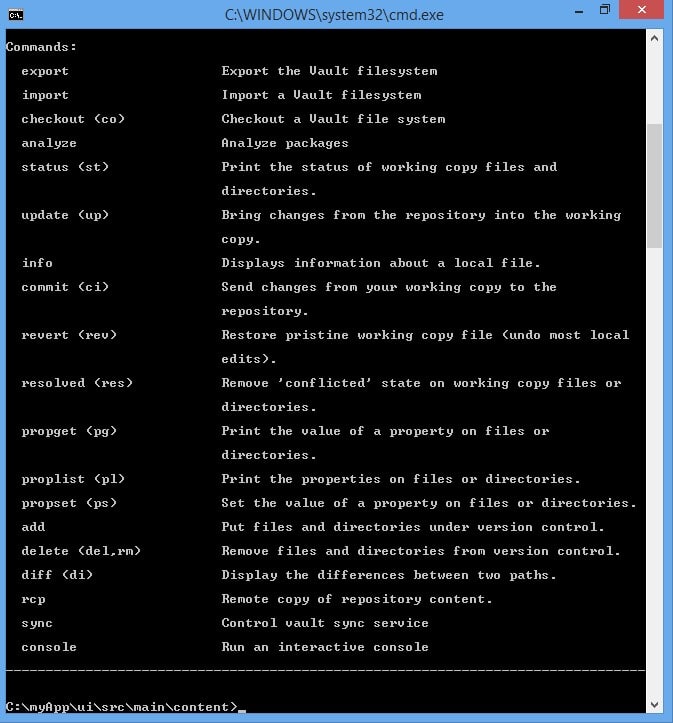
- Open a command line shell and execute vlt –help. Make sure it displays the following help screen:
Step 3
- Open eclipse by double clicking eclipse.exe
- Create a new workspace for your project and name it myApp.
- install maven plugin through eclipse market place
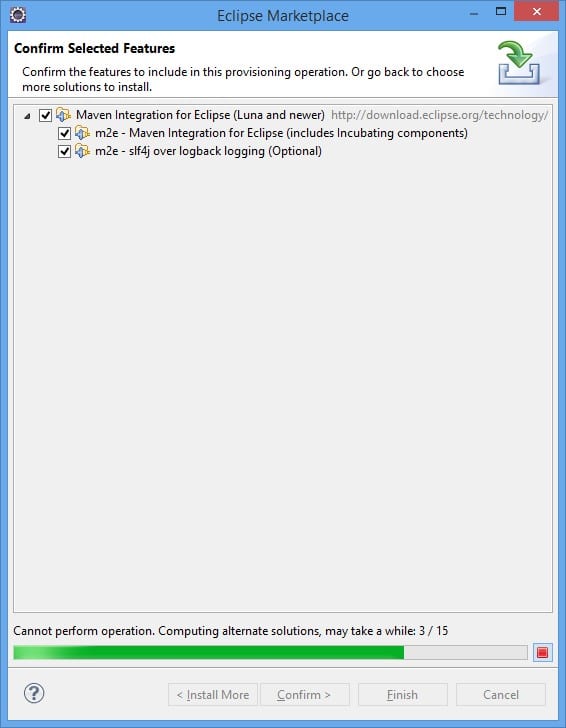
- After installation, restart Eclipse.
Step 4
In this section, we create two Maven projects: One called UI (after User Interface) which contains the CQ5 project structure with the JSP scripts and the other called Core which contains the Java code (source and compiled). The compiled code is stored in a jar file. The advantage of such a structure is that it adds modularity and autonomy to the logic of your application because each jar file (bundle) can be managed separately. Follow the below steps:
- In Eclipse, click File > New > Other.
- In the dialog, select Maven > Maven Project and click Next.
- Select the Create a simple project option and the Use default Workspace location option, then click Next.
- Specify the following property values for the Maven project, and accept the default values for all other properties:
- Group Id: com.day.cq5.myapp
- Artifact Id: ui
- Name: CQ5 MyApp UI
- Description: This is the UI module
- Click Finish.
Now, set the Java Compiler to version 1.5:
- In the Project Explorer view, right-click the ui project and click Properties.
- Select Java Compiler and set following properties to 1.5:
- Compiler compliance level
- Generated .class files compatibility
- Source compatibility
- Click Ok
Now, create the filter.xml file that defines the content that VLT exports:
- In the Project Explorer view, in the ui/src/main folder, create the content folder.
- Under content, create the META-INF folder.
- Under META-INF, create the vault folder.
- Under vault, create the filter.xml file.
In filter.xml, copy the following code to filter.xml:
<?xml version=”1.0″ encoding=”UTF-8″?>
<!– Defines which repository items are generally included –>
<workspaceFilter version=”1.0″>
<filter root=”/apps/myApp” />
<filter root=”/etc/designs/myApp” />
</workspaceFilter>
- Now, save filter.xml.
Step 5
Use VLT to check out the CQ5 content into your ui project:
- In the system command line, change the current directory to the following directory in your Eclipse workspace: <eclipse>/<workspace>/myApp/ui/src/main/content.
- Execute the command: vlt –credentials admin:admin co http://localhost:4502/crx
- This command creates the folder jcr_root under <eclipse>/<workspace>/myApp/ui/src/main/content. This maps to the CRX root (/). Under jcr_root the following files and folders are created, as defined in filter.xml:
- apps/myApp
- etc/designs/myApp
- It also creates two files, config.xml and settings.xml in //myApp/ui/src/main/content/META-INF/vault. VLT uses these files.
- In the ui Eclipse project, create a link to the apps folder that you just checked out. This link enables your JSP scripts to reference the files.
- Right-click ui, select New, and then Folder.
- In the dialog box, click Advanced and select Link to alternate location.
- Click Browse, specify <eclipse>/<workspace>/myApp/ui/src/main/content/jcr_root/apps, and then click OK.
- Click Finish.
For any queries, please feel free to contact – aem@nextrow.com
Adobe CQ5 Offering Trending Digital Experience
In a competitive business environment, it is a challenge for an organization to take control of its brand presence. That means, every company have to reach its target audience to drive sales of its brand. In other words, the more an organization takes a brand into its customer base, the better it gains profit. One best way to maintain brand presence in a digitally-paced business world is going online because online brand presence plays a major role in a company’s business growth. According to World Internet Statistics, almost 40% of the world’s population is using the internet by 2013 with a growth rate of more than 673% from the last 14 years. These stats offer a clear picture of how the digital experience has been dominating the world from the beginning of 21st century. Also, several companies have been maintaining their own websites to reach their target audience through the internet. However, choosing the right technology will always result in positive outcomes. One such technology is Adobe CQ5, a technology offering trending digital experience.
Organizations Implementing Adobe CQ5
Several major organizations including but not limited to Audi, Volkswagen, Hyatt and TE Connectivity have been using Adobe CQ5, also known as Adobe Experience Manager, to improve their online brand presence. Here are some implementation examples of Adobe Experience Manager by major organizations for their business needs.
- Hyatt supporting travelers on a global scale using Adobe CQ5:
Hyatt Hotels, an American multi-national hospitality giant, has been manually operating over 600 websites in ten languages using Adobe CQ5 to offer its customers a high-end digital experience. The main focus of the company is to enable customers to plan and manage hospitality while they travel, just by using their websites. Using Adobe Experience Manager, Hyatt is providing a huge amount of high-end content to its customers through a different medium including tabs, mobile phones, computers and more. According to Hyatt, they managed to move more than 600GB of images to its database using digital asset management capabilities from Adobe Experience Manager. Using Adobe CQ5, it has also managed to publish more than 500,000 web pages globally. More than 250,000 people visit their websites on a daily basis.
1.1 An image showing digital experience of Hyatt’s website - Adobe CQ5 driving Audi to innovate:
elevated its digital brand experience by using digital asset and web content management capabilities of Adobe Experience Manager. The company is currently operating 93 websites in 40 different languages with an aim to offer a high-end digital experience to convey the message about their vehicles. Audi offers its customers the flexibility to compare vehicles based on specifications, pricing, features and more through their websites before visiting a showroom. Using Adobe CQ5, it has also integrated the Audi Configurator feature, used by more than 90% of its site visitors, to build the model of their choice with options to customize features. Using Adobe Experience Manager, Audi’s dealers and web teams are developing websites, without any technical knowledge, to offer better online customer experience. Every year more than 156 million visitors are navigating through Audi websites for information.
1.2 An image showing the digital experience of the Audi Configurator feature
Why to choose NextRow for Adobe CQ5 implementation?
There are several organizations offering CQ5 development and AEM consulting services but choosing the right one will always matter. To serve all your digital needs, talk to us. We always differ from other companies with our unique services. At NextRow, we have the most creative, experienced and Adobe certified CQ5 developers to assist you in developing a great digital experience using Adobe CQ5 enabling you to reach your target audience globally. We also have hands-on experience in integration of marketing tools such as Eloqua, Marketo, Adobe Campaign with AEM. We also have delivery teams across all time zones to serve you better. We offer different services with Adobe CQ5 including:
- AEM consulting and implementation:
Our team of experts will offer you their expertise in Adobe CQ5.x to enable you to implement AEM suite of products in offering your customers a highly personalized digital experience.
- CMS migration to Adobe CQ5:
If you want to migrate from different content management system (CMS) tools to Adobe CQ5 then we will be at your service with single request. We have a professional team of experts with deep experience to migrate a range of CMS tools including SiteCore, Acquia, Drupal, Magnolia, Interwoven TeamSite, Jahia, dotCMS, Alfresco, Vignette and custom CMS to Adobe CQ5.
- AEM maintenance and support:
We have gained the trust of our clients by not only offering CQ5 development services but also providing support and maintenance services to organizations having their own Adobe CQ5 To meet digital needs of organizations, we also develop custom modules for Adobe CQ5.
- AEM, Adobe Marketing Cloud integration:
To reach target audience globally and offer high-end digital experience to customers of our clients, we will integrate Adobe CQ5 with different tools including Adobe Scene7, Adobe Test&Target, Adobe Social, Adobe SiteCatalyst, and Adobe Audience Manager in the Adobe Marketing Cloud.
- Integration with third party applications:
Our team of experts will also integrate AEM with different third party applications including Customer relationship management (CRM), E-commerce and billing.
Besides this, NextRow also offers Adobe CQ5 training services with certified trainers, who have deep experience with major AEM projects. Different types of training programs include CQ Author Training, CQ Developer Training, CQ Advanced Developer Training, CQ System Administrator Training, AEM Digital Asset Management, AEM Social Communities and more.
Knowledge to effectively implement Adobe Target solution to your existing digital platforms. We have highly skilled professional and Adobe Certified digital consulting teams to deploy it and help you create a robust digital infrastructure. For any query or help contact us at +1-847-592-2920 or follow the link
Evolution of Adobe Experience Manager From Adobe CQ5
In today’s fast-paced digital age, customer expectations are changing daily. Most organizations are investing in new technologies to digitize their business in a way to reach the expectations of their customers. One such trending technology is Adobe Experience Manager (AEM), formerly known as Adobe CQ5.
AEM is a powerful platform with amazing features, such as drag-and-drop content authoring, digital asset management, multi-channel publishing, personalization, and analytics. You can integrate with other Adobe Marketing and Creative Cloud Products.
In this blog, we will go through AEM and discuss what it is, its history, technical background, benefits, and more.
What’s an AEM or Adobe CQ5?
Adobe Communique 5 (Adobe CQ5), currently known as Adobe Experience Manager (AEM), is a web-based content management system for high-end digital experiences. It allows businesses to create, manage, and deliver digital content across various channels such as web, mobile, and social platforms. It also helps in creating, editing, and publishing content along with digital assets and workflow management.
It supports a range of analytics and personalization tools, which enable organizations to track user behavior, segment audiences, and deliver personalized experiences based on user data. Adobe AEM also helps businesses to drive sales by attracting customers’ attention.
History
AEM has a quite complex history starting with CQ5, which is a version of Day CQ portfolio developed by a Swiss-based software company Day Software in 2008, following Day CQ 3.5, 4.0, 4.1, and 4.2. Adobe Systems renamed Day CQ5 as Adobe CQ5 after acquiring Day Software in 2010. Following the release of the fifth version of CQ5 i.e., 5.5, Adobe renamed it as Adobe Experience Manager (AEM) in 2013 with a sixth version AEM 5.6. Since then, Adobe released various versions of AEM and the latest is 6.5.
After the acquisition, Adobe integrated it into its existing suite of marketing and creative tools, including Adobe Marketing Cloud, Adobe Creative Cloud, and Adobe Analytics. In 2013, the first version of AEM as a standalone product has been released that can be used without Adobe’s other marketing tools.
Adobe keeps enhancing AEM’s capabilities and adding new features such as digital asset management, social media integration, and mobile app development. Now, its cloud version is also available. Adobe continues to work on AEM’s development while focusing on its cloud capabilities, AI and machine learning capabilities, and integration with other Adobe products and services.
Technical Background
The server of AEM is platform-independent as it is based on Java. AEM is also based on the Apache Sling web framework that simplifies the development of RESTful web applications.
It is an integration of both application-level, as well as infrastructure-level functions.
At the application level, it enables users to manage content, mobile apps, digital assets, websites, e-commerce, social communities, and more.
At the infrastructure level, it can be deployed in a standalone mode or as a web application in a third-party server. The Sling Web Application Framework can reduce the overhead of developing content-oriented applications and store all the data (from authors) and code (from developers) on its Java Content Repository (JCR) database.
All in all, its technical architecture is designed to offer a flexible, scalable, and customizable platform for digital content management and delivery.
Benefits of Using AEM
AEM helps in web content management and digital experience delivery. Here are some of the key advantages:
- Robust Content Management
It offers a robust set of tools for content creation, management, and delivery. Content creators can easily create and edit content using these tools while providing workflows for approval and publishing.
- Build Amazing Websites
Develop high-end websites for all types of devices to manage on-site and in-store experiences by using different methodologies. It helps companies increase sales.
- Digital Forms
Use digital forms from AEM to provide a user-friendly experience to the end users and can also offer quick responses after submission.
- App Promotion
Edit interfaces of mobile apps provided by Adobe CQ5 to change data, import digital assets from other mediums, and improve the performance of apps to promote a brand.
- Build a Brand
Build their brand by using AEM brand marketing capabilities to create streamline for brand assets approval; search, deliver and organize brand assets; and also share personalized experiences to target channels and more
- Multi-Channel Delivery
It enables content delivery across multiple channels, including websites, mobile apps, and social media platforms. Brands can deliver a consistent experience across all touchpoints to their customers.
- Personalization
AEM can help you increase engagement and conversion rates with its built-in personalization capabilities that allow marketers to deliver personalized content to different user segments based on factors such as demographics, behavior, and location.
- Integration with Creative Tools
AEM can easily integrate with creative tools such as Adobe Creative Cloud, allowing designers and developers to work seamlessly within the same platform.
- Scalability
AEM is based on a scalable architecture that enables it to handle high volumes of content and traffic. This makes it a good fit for any organization that has complex digital experience requirements.
- Flexibility
As it is highly customizable so it can be tailored to meet your specific needs including customizing workflows, templates, and integrations.
AEM’s Future Scope
The digital landscape continues to evolve with an emphasis on delivering personalized and omnichannel experiences to customers. So, AEM is also expected to continue to evolve and play an important role in the digital experience platform (DXP) market.
Adobe has already introduced cloud-based versions of AEM- Adobe Experience Manager Sites as a cloud service and Adobe Experience Manager Assets as a cloud service. Its AI and ML capabilities such as Smart Tags for image recognition already enhance the user’s experiences. Additionally, AEM’s capabilities in this area, such as its audience segmentation and personalization tools, are likely to become increasingly important for organizations looking to stay ahead of the competition.
All in all, we can expect AEM to continue to be an important player in the DXP market, with a focus on cloud-based solutions, AI and ML capabilities, and delivering personalized, omnichannel experiences to customers.
If you need any help with AEM integration, implementation, and usage, connect to our experts at info@nextrow.com.